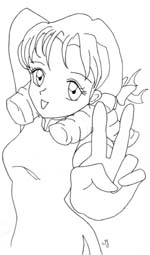
 Figure 2.1 - Scanned ink image |
Starting point: - You have a clean inked image ready for scanning
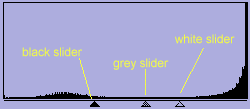
Lesson *Tip- when your scanning software shows you the preview of your image, crop out as much whitespace as possible to save on memory later. If you want to have a huge, wide background, you can always copy your image onto a larger canvas after it has been coloured. 2ii) Your image will appear in photoshop at an enormous size. Don't worry about that quite yet. First fit the image on the screen (press 'z' for the zoom tool, then right-click on the image and choose 'Fit on Screen'). Then go to a fairly detailed area (where your lines are the finest- I usually choose the eyes) by right-clicking your mouse of this area and choosing 'Actual Pixels' from the menu that pops up. 2iii) To remove any little specks or leftover light pencil marks, use photoshop's Levels option (Image>Adjust>Levels). This will take a little while to appear, because your image is pretty huge ^_^. When the little graph appears, make sure that the 'Preview' checkbox is checked, then move the black slider (leftmost) and white (rightmost) slider beneath the graph until what you can see of your image is as clear and bright as possible.
2iv) Press 'OK' when you're happy, then press 'z' for the zoom tool, right-click on your image, then choose 'Fit on screen' to check out your whole image- it will look a little choppy because Photoshop has compressed your image, but it's just an optical illusion- the full-size image is smooth. If you don't like the levels adjustment, press ctrl-z to undo levels, then follow step 2iii again. 2v) Now you can resize your image. It has to be big for colouring, but don't make it too huge, because your computer will conk out when you start colouring and adding new layers. I like resizing it so that the longest side (usually the width) is ~1000 pixels. This can end up taking about 15Mb when I'm in the most complicated colouring stage.
Finishing up: |
Next tutorial: Preparing your line art for colouring
